Reading many books this year and observing successful fashion designers and illustrators, I realized that the key to a good fashion drawing is sketching the body correctly. When you are drawing clothes, if the body underneath is not correct, than the clothes also wont be drawn in correct proportions. Therefore, I decided to learn more on how to draw a fashion croquis and will share a simple way to do it in this post.
The word croquis actually means sketch in French and it represents a basic sketch of a fashion figure intended for drawing clothes in a proportionate and accurate way. When we are drawing clothes, we want to present them in the most appealing way possible and the fashion croquis presents that foundation that gives clothes their shape and shows them in the best light.
A fashion figure is different than a regular figure drawings as it is an idealized figure with longer legs, thinner hips and torso and a slightly smaller head. This kind of figure makes clothes look more dramatic and big enough to be the first to caught the eye. A regular figure is usually around 8 units - eight heads from the top of the head to the ankles and fashion figure is usually 9 heads long.
Step by Step Drawing a Fashion Croquis
Drawing a basic fashion figure is not about art but rather it represents a tool for communicating a design. Once you have your first fashion croquis template, you will be able to use it for tracing and drawing clothes over and over again. The fashion figure is very simplified and the most important things is to make it look anatomically correct, well proportioned, almost like a mannequin.
The Fashion Croquis will be 9 heads in length and the size of different body parts is expressed as multiples or fractions of that length. Most of the body parts resemble to common geometric shapes such as ovals, cylinders, spheres, rectangles and so on. Having in mind a corresponding geometric shape and then making the adjustments will make drawing parts of the body much easier and more accurate.
Step 1 - Warm Up Exercise
Take a pencil and a piece of paper and place two dots randomly on the paper about 10 cm (3 inches) apart. Put your pencil on one dot and draw a line to the other one quickly without removing the pencil from paper. Repeat this a couple of times until your lines feel smooth and natural.
Step 2 - Draw an Axis Line and Mark Sections
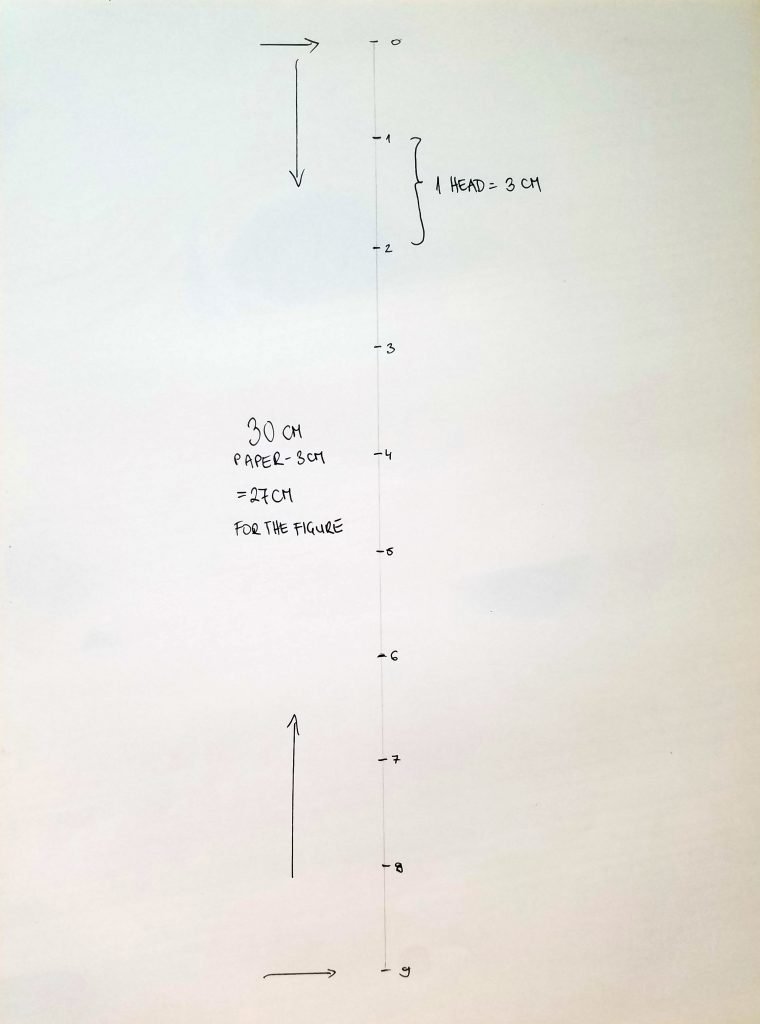
Draw an axis line from top to bottom of your page and divide into 9 equal parts. Leave about 1 cm above and below your figure and divide the rest into equal parts. For example if you have an axis line long 32 cm then each section would be 3.5 cm.

Step 3 - Start Drawing Body Parts
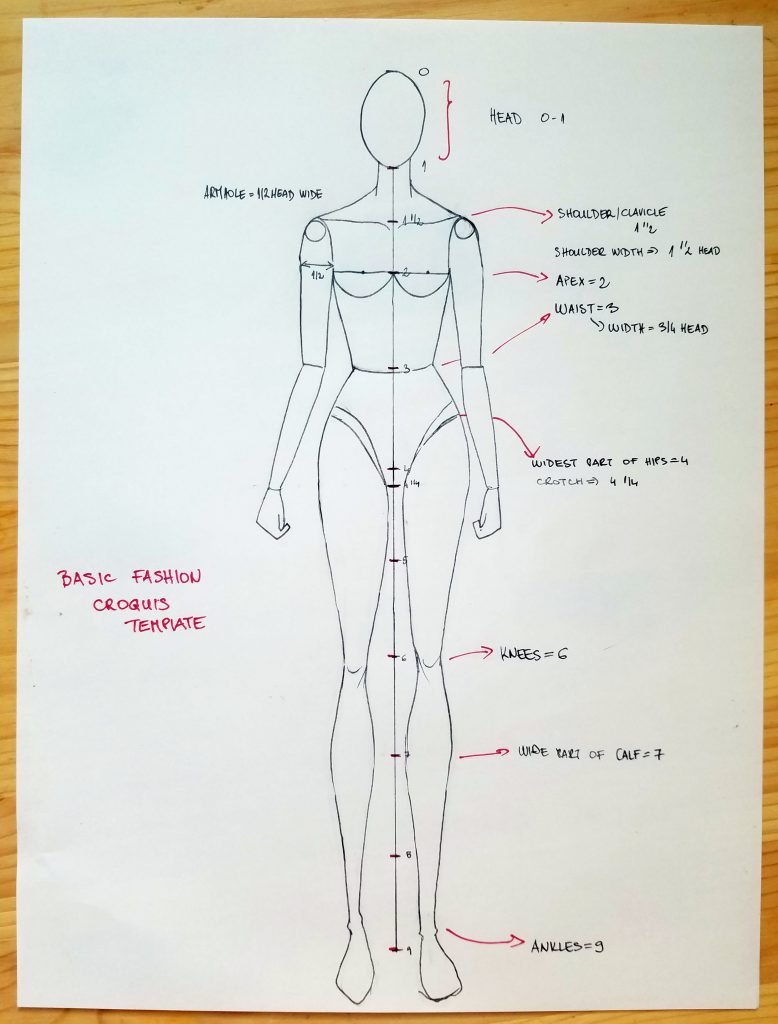
Between 0 and 1 draw an oval that represents your head. You can practice making an oval separately on a piece of paper and when you are confident it looks somewhat symmetrical draw one on your axis line.
Draw the neck from the bottom of the head to 1 1/2 and make it nice and narrow.
At the 1 1/2 point you should draw shoulders and make them wide 1 1/2 head as well. Draw the shoulder line slightly above the base of the neck and at each end of the shoulder make a small circle representing the joint and rounded shape of the shoulder. Armholes should be wide around 1/2 head long and turned inwards slightly.
Place two dots equally distanced from the axis that will represent your bust line and then draw torso tapering down to head no 3 where the waist is located and should be 3/4-1 head wide.
The widest part of the hip should be placed at 4 heads with crotch on 4 1/4 heads. The hips extend from 3 to 4 and are 1 1/2 head wide.
Upper arm is 1 1/2 heads long and connects the armhole to the elbow which is located around point no 3. The lower part of the arm extends from the elbow to 4 with slightly longer finger tips.
Mark your knees at 6 and make them 1/4 head wide. Draw lines down from the crotch on either side to the knee. Draw the outer thighs from hips tapering down to 6. Try drawing them fluently, without lifting your pen from the paper.
Point 7 represents the widest part of the calf and it should be slightly wider than the knee. Slide down from the calf to number 9 creating a very thing ankle. The feet extend a little bit beyond the 9 heads.

Step 4 - Fleshing Out the Croquis
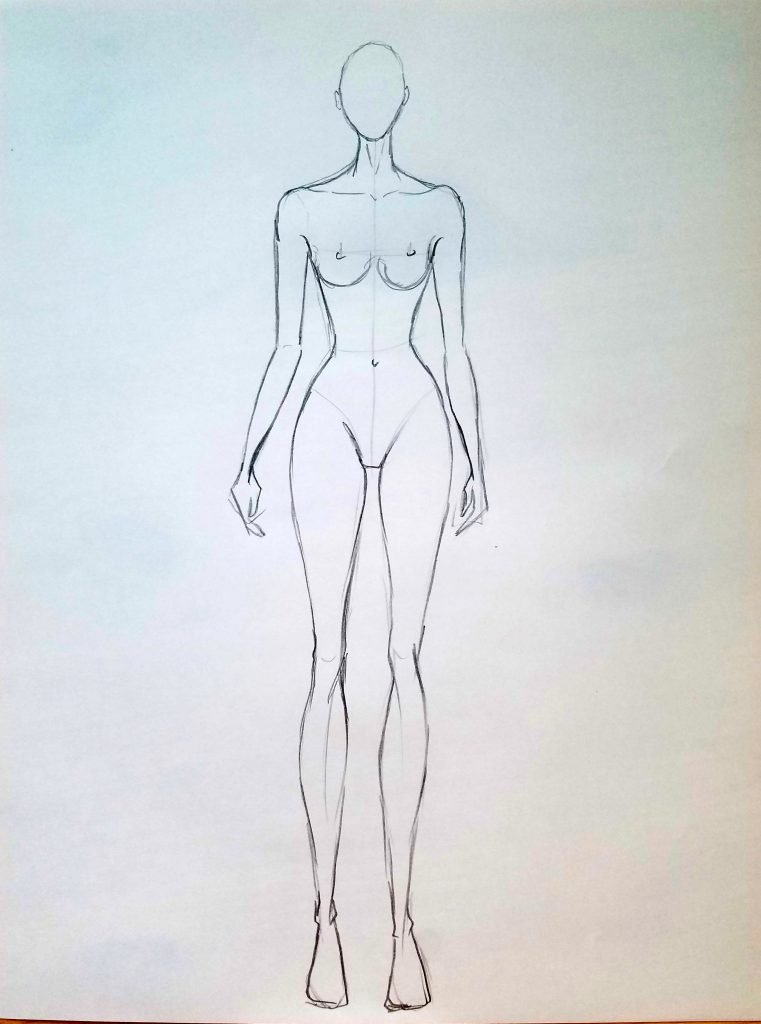
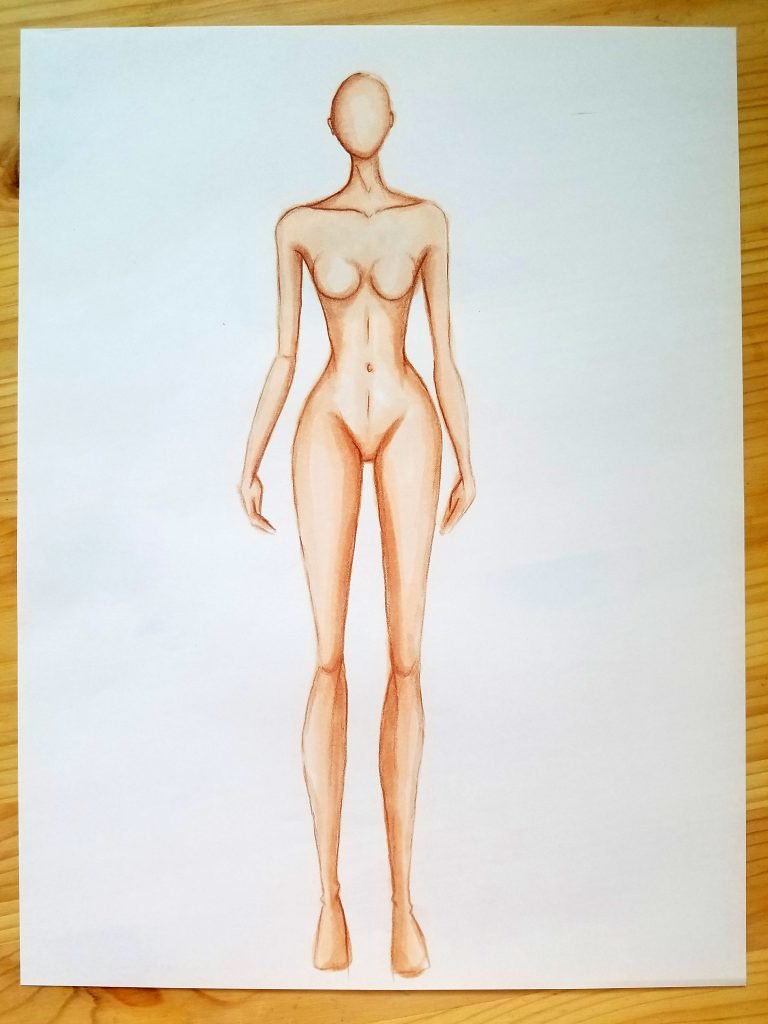
In order to create a realistic and finished look, you should add some muscles that will give a rounded overall look. You can draw larger or smaller muscles according to your preference.

Step 5- Repeat and Practice
The first time you draw a croquis will probably take a lot of time and it will not feel as fluid as it should be. Practice is the key to learning and perfecting everything so don't give up and try again. You can do your first drawing with a light mechanical pencil and then draw the figure 5 times using a dark, soft pencil like 2B. Try making a croquis out of a cardboard or craft paper so you get familiar with the proportions of the croquis and have fun practicing.

Hope this was helpful and good luck with your fashion illustration journey!

Tanx
I thanks for this note because its help me to be perfect.